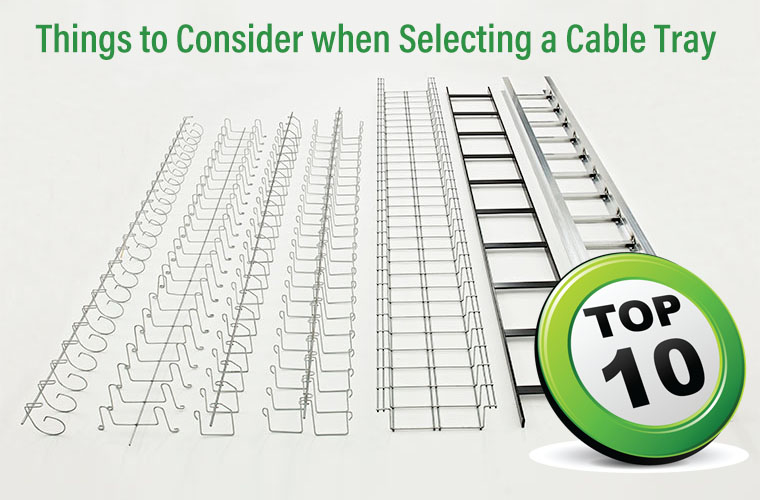
We want to see your next construction project succeed whether you choose Snake Tray as your partner for cable management solutions or not (although we don’t know why you wouldn’t).
Please allow our cable tray experts to offer these bits of advice when selecting a cable tray to help guide your selection of the right cable tray for every job.
1. Consider the environment regarding tray finish
 Cable trays can be used both indoors and out. For outdoor use the trays must have extra protection, especially near saltwater bodies, to prevent corrosion and failure from exposure to the elements. Snake Tray customers can choose from hot dipped galvanized, stainless steel, or powder coated finishes to lock out moisture. Also, note that environmental conditions such as ice, snow, heavy winds, extreme temperature fluctuations, and even possible seismic activity can impact the cable types and volumes deployed in the tray. Snake Tray offers trays with a “lobster trap” design that securely hold cables in hurricane force winds for outdoor applications.
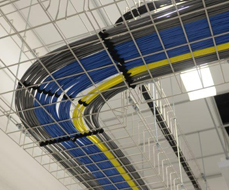
 For indoor use, pre-galvanized and electroplated finishes are the norm, however powder coated trays are becoming more prevalent with architects and interior designers where the cable pathways are exposed. Snake Tray offers a rainbow of powder coated finishes so cable trays may blend with the surrounding décor in “open” commercial, institutional, and office installations.
2. How will the trays be installed?
 Cable trays can be mounted in multiple ways; most are hung from the ceiling using threaded rods. Others are mounted directly to ceilings, walls, floors, rooftops, or are bolted to equipment racks in a data center or telecom room. Some cable pathways transition from wall to ceiling and back or change elevation.
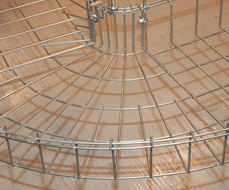
Make sure the tray you choose is designed to be mounted to the proper horizontal and/or vertical surface(s).  Many competitive trays will require the use of support struts and accessories to hang the trays and manage transitions. Snake Tray products have built-in universal mounting rings that attach to any surface without need for additional hardware. Features such as quick connection mechanisms, prefabricated basket tray sections, and hand-bendable trays enhance flexibility, speed installation, and reduce labor costs.
3. What kinds of cables can be loaded into a cable tray?
The NEC sets the standards for cable loading and the type of cables that are approved for use in a cable tray. The most frequently used tray cables are:
- Tray Cable; type TC
- Power Limited Tray Cable; type PLTC
- Instrumentation Tray Cable; type ITC
- Metal Clad Cables; type MC
- Mineral Insulated, Metal Sheathed Cables; type MI
- Optical Fiber Cables; types OFC thru OFN
- Communication Cables; types CMP, CMR, CMG, CM, CMX
- Fire Alarm Cables; types NPLF – NPLFP, FPL – FPLP (CI)
Snake Tray’s cabling experts can help you select the proper tray for each cable type.
4. Know your fill ratios to properly size the cable tray.
 The NEC Article 392 also sets limits for the volume of cables that can be loaded in a tray. The type of cable tray (e.g., solid, ventilated), ampacity (current-carrying limit) requirements, and voltage rating of the cables used determines the allowable fill for each cable tray. Overfilling a cable tray can lead to heat build-up, mechanical damage to cables, and potential safety hazards.
For low voltage and communication cables, the standard allows up to 50% fill capacity based on the cross-sectional
area of the tray. 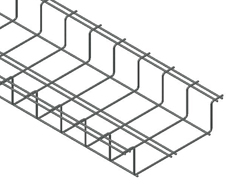 As an example, a 4” x 12” tray has a cross-sectional area of 48“ square. A typical .3” diameter CAT 6 communication cable equates to 0.070“ square. At a 50% fill rate, the 4” x 12” tray would hold roughly 342 cables.
For higher voltage cables up to 600 V, the issue here is ampacity. NEC Sections 392.9 – 12 describe cable fill in terms of area and cable diameter. The ampacity criteria in Article 392 are based on not exceeding those fill values. The number of conductors that can be installed in a cable tray is also limited by the weight of the cables for its given load rating.
Be sure to size the width of the cable tray and its load rating to accommodate for future expansion and additions. Never install trays that will reach the 50% fill capacity instantly. Snake Tray offers cable trays in widths up to 24” wide. Stepping up width in 6” increments from 6” to 12”, 18”, or 24” only increases the price by about 10% over the previous tray size. Check out our Loading Capacity Guide here.
5. Don’t forget the accessories.
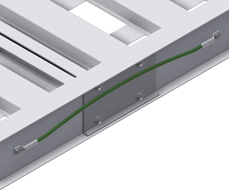
 Does the project call for additional components such as power or data modules? Make sure the cable tray you choose allows for the attachment of things like security cameras, occupancy sensors, and smoke detectors. It should also permit cables to safely exit the tray for end-point connection to devices.
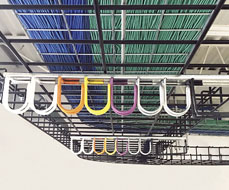
 Snake Tray’s Mega Snake® products allow for the easy integration of multiple accessories pertaining to the cables in the tray. For low voltage cabling, patch panels, cable waterfalls, cameras, and laboratory components can be directly mounted to the Mega Snake side rail.
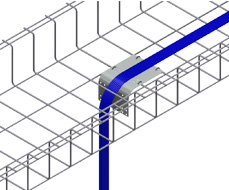 On the electrical side, Mega Snake has a full complement of utility boxes, power modules, conduit plates, and cable dropouts that also attach directly to the built-in rail system. No accessories needed for accessories!
6. Electrical bonding.
 While low voltage systems may not be required to be grounded for shock or arcing, they should be grounded for noise, lightning protection, and electromagnetic interference. For higher voltage systems it is important to treat the cable tray as an equipment grounding conductor in conjunction with the ground conductors in the cables or an individual ground conductor.
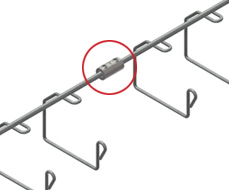 The purpose of grounding is to minimize the damage from a wiring or equipment ground fault, and cable tray systems are considered a path of ground fault currents. Cable tray sections are bonded together through bolts, splice plates, clamps, and bonding jumpers. All bonding jumpers must be sized accordingly to meet the requirements of equipment grounding conductors. Both side rails of the tray must be bonded together to the next section. Snake Tray offers simple to install hardware that provides a mechanical and bonded electrical connection in one step. Snake Tray is your one-stop shop for all cable management needs!
7. Is it future proof?
What does the future hold? If the past 20 years are any indication the need for cable management will only increase. Smart buildings. AI-driven data centers. Solar plants. The underpinnings of our mobile world are hidden cables connecting wireless access points to the hardwired network. These drivers and others will continue to fuel the need for effective and flexible cable management solutions.
 Cable trays should always be sized to accept additional cables in the future, and most engineers use a rule of thumb to only fill the trays to 40% capacity at time of install; 10% less than the NEC max fill capacity. What this means is that larger trays should be installed whenever possible to allow for future growth and expansion. As stated previously, adding six inches to the width of a Snake Tray cable tray only increases its price by approximately 10%, a lot less than the cost of adding a second tier.
8. Are there any job site limitations, material handling, or shipping concerns?
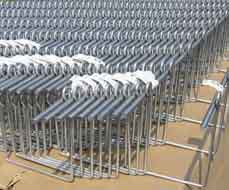
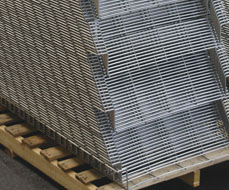 An integral part of any project is having a place to store materials on the job site before it is installed. Snake Tray products are designed to nest together for a much higher density of material per square foot.
Typically, Snake Tray occupies 50 to 60% less space as the same number of competitive cable trays that do not nest. Advantages here include:
- Store all material in one place; easier to secure and track inventory.
- Lowers project carbon footprint by minimizing the number of trucks required for material delivery.
- Reduces overall freight expenses, streamlines shipping and handling processes.
- Makes material handling easier for installers.
9. Consider the cost of on-site fabrication.
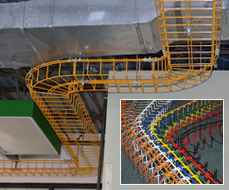
 Building sweeping turns, Tees, and elevation transitions out of straight basket tray sections on-site is a time consuming and costly process. Highly skilled craftsmen are required to cut, grind, weld, and fabricate each piece manually, significantly impacting productivity and time to completion. Rather than spending 60 to 90 minutes completing each fixture, Snake Tray offers two classes of cable trays that slash installation time by up to 90% and we prove it in this video.
 Mega Snake sections are available in prefabricated turns, Tees, and crosses that connect to the next segment in under five minutes. Our hand-bendable cable trays allow installers to navigate around any obstacle in seconds by shaping the tray as needed without tools. This also allows for the use of less skilled labor, further reducing overall cost of construction.
10. Ensure infrastructure compatibility.
Will your selected cable tray work and play nice with other aspects of the project made by different manufacturers? Don’t get locked into purchasing a proprietary system that makes integration or transitions difficult or requires a specific accessory.
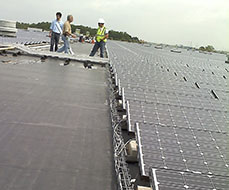
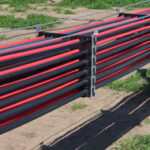 Snake Tray products are universal. Our Solar Snake Max products attach to any kind of pilings and transverse any terrain. Our hand-bendable cable trays have built in mounting rings that attach to any surface at any angle without struts or trapezes.
 The prefabricated 801 Series Mega Snake system hangs from a single point using standard threaded rods and bolts.
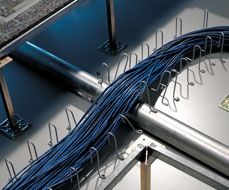
 Our 301 Series Snake Canyon® basket tray system is compatible with any brand of raised access floor (RAF) to build concealed cable pathways using a simple drop-in process and will not void any floor manufacturer’s warranty.
Have any further questions? Please reach out. We’re happy to help guide your next cabling project from concept to completion.